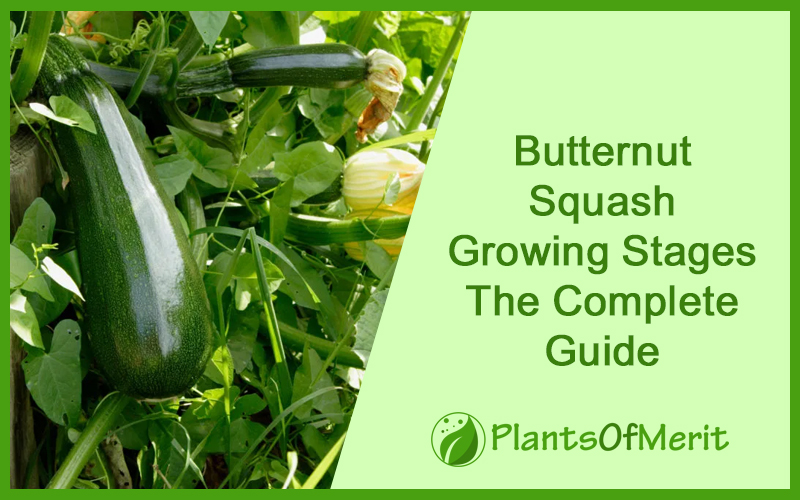
Squash is a vegetable that is gaining gradual popularity among people, thanks to its versatility. From roasting to soups, you can use this vegetable in just about anything. What’s great about butternut squash is that not just the cooking aspect, even growing this vegetable is pretty simple.
There are multiple stages involved in growing butternut squash and each stage holds a lot of significance in the growing outcome. If you are a complete newbie, not being aware of these individual stages can be challenging.

Amidst all the different types of squashes available, butternut squash is hands down one of the most versatile ones to grow and cook. Given the fact that they are nutrient-dense, it isn’t surprising that growing this vegetable is extremely rewarding.
This article will explore everything you need to know about the butternut squash growing stages and all the tips and tricks to grow the plant optimally without any hassle.
What are the Butternut Squash Growing Stages?
Growing butternut squash typically is a six-stage process, where it grows from the seed to the actual vegetable that you can then harvest and eat.

Understanding each of these stages make all the difference, especially when it comes to growing them the right way and yielding a good harvest from the process.
Here’s a quick breakdown of all the growing stages:
Stage 1 – Seed Preparation

Butternut squash belongs to the nightshade family, which includes other common vegetables like potatoes and tomatoes. So, when it comes to growing butternut squash, you have to pay close attention to the growing parameters because even the slightest issue or disregard might end up affecting the plant’s overall growth.
Additionally, when it comes to growing this type of squash, you have to be careful of one thing. Since it’s from the nightshade family, the leaves and stems secrete a fungicide toxin called solanine, which can lead to a variety of symptoms, including irritated or inflamed skin, nausea, cramps, diarrhea, etc. So, if you have heightened sensitivity to this toxin, it is ideal to practice caution.
Now, coming to the seed preparation process. The seeds that you need to sow are generally all-black with a hard outer shell. Eating this outer shell is harmful and toxic to both humans and animals, so you need to keep that in check. Keep it out of reach of children and pets.
When it comes to seed preparation, you need to clean the seed and pick the ones that are whole and without any cracks. These are the ones that germinate the best.
Stage 2 – Sowing the Seed

The next step in the process is sowing the seed. But, before doing that, you need to prepare the soil where you will plant the seeds. Butternut squash needs consistent sunlight exposure, which means that you have to plant the seeds somewhere in the garden where there is direct sunlight.
Also, before you sow the seeds, find an area in the garden where the vines will have enough support to either grow vertically or spread out its vines on the ground. As for the soil, you want to sow the butternut squash seeds in nutrient-dense and rich soil with optimal water retention.
You want the soil to hold enough water but at the same time, you need to ensure that it is well-draining so there are no risks of water logging in the soil. If you want to enrich the soil organically, compost and organic waste and leaves work well too. Surround the area with mulch too for optimal growth.
Now, coming to the sowing techniques. When planting the seeds, keep in mind that you’d need both male and female plants to bear flowers and then the fruit. The females generally grow in clusters of three to four, so spacing out the seeds in the garden is quintessential. The last thing you want is for the entire area to feel crowded.
Once you pick the immature green fruits (the first ones) from the female plant, the second round of growth is where you will get access to the ripe butternut squash, which is bright orange or reddish-orange. You don’t want to eat a butternut squash that has green on the skin. It isn’t safe and can lead to digestive complications.
Stage 3 – Germination

Seed germination is the first stage of seed development of the butternut squash plant. To ensure optimal germination, maintaining the environmental factors is crucial. You want to ensure that the soil temperature is around 70 degrees Fahrenheit and higher.
As for the timing, the seed germination typically takes 3-4 days after sowing the seeds in the soil, so you need to be patient the first few days. Once the seeds have germinated well, the plant will also start sprouting small leaves from the plant too.
In case you have sown the seeds indoors, keep in mind that you need to wait until the plant shows a few sprouts before you can consider shifting it outdoors. The reason behind this wait is to give time for the plant to be able to develop its rooting system before you transfer it to the soil in the garden.
Another important part of seed germination is to be mindful of the watering and moisture levels in the soil. You don’t want the soil to be heavily waterlogged because that’s what leads to complications, especially related to the dying root system.
Stage 4 – Fruit Development

Once the seedlings have appeared and the germination is done successfully, the next stage is fruit development. This is the part where it takes that maximum time out of all the six stages. You need to be extremely mindful and patient throughout this stage.
The seedling will consistently develop into flowers, which is where the fruits are born. The flowers typically mature into fully developed fruit. However, getting to the stage of noticing the bright orange-colored butternut squash takes time.
It starts with the development of the unripe green-colored butternut squashes, which typically have flowers attached to them. When you notice these growing, your work is to cut them off the plant when they measure around 4” in length.
Once you do that, the edible butternut squash starts growing, which you can go ahead and harvest once the fruit reaches a decent size. Wait until the fruit develops into a decent size, following which you can destem it and grow it as per normal and without any complications.
Also, when it comes to handling the said fruit, you want to ensure that you aren’t overdoing things. The last thing you want to do is damage the delicate stems or tear the fruit so roughly that it affects the root system. Each fruit is ready to be picked when you hold them and they feel solid to hold.
Stage 5 – Maturation of the Fruit

If you want to harvest an edible butternut squash, which you can roast or turn into soup, you have to wait and be patient. Once the fruit develops on the stem, the next step is maturation, which will take some time.
Your work is to encourage the growth of the fruit on the vine as much as possible. You don’t want any speck of green on the squash when you harvest it because that’s where the complications arise. The mature green butternut squash hanging from the plant should be taken out once the fruit reaches around 4” in length.
But, once you cut those off, you need to let the fruit mature before it is ready for the final harvesting. This is the period you let the butternut squash mature until it reaches a good eating size, so you can harvest it accordingly.
You know your butternut squash is mature when it feels solid in the hand and the color has turned bright orange or reddish-orange from the staple green. Also, during the maturation process, you need to eliminate all the flowers attached to the stem. Doing so enhances the starch concentration in the plant’s root system, improving the final yield.
Stage 6 – Harvesting the Fruit

The last stage in growing the butternut squash plant is harvesting the fruit. You will know your fruits are ready to be harvested just by looking at them. Besides the fact that they turn a bright shade of orange, the plant also has the vines dry up completely once it is ready to be harvested, so keep that into consideration.
Also, if you are saving the seeds for growing the plant again, we’d recommend you wait until the vines have completely dried out and died into the ground before you can consider collecting the seeds.
If this is your first round of growing butternut squash, avoid collecting the seeds from the first growth and harvest. Instead, let the plant grow through another season and then collect the seeds from that time.
These are the six stages of growing butternut squash from a seed to a full-blown plant and then harvesting the fruit from the same. What you need to be mindful of is ensuring that you are growing the plant optimally following the right techniques as mentioned.
How do Water and Fertilize the Soil for growing Butternut Squash?
While cultivating butternut squash isn’t rocket science, what you fail to realize is that it takes a lot of time, effort, and precision.
Butternut squash plant requires optimal watering and fertilization to grow without any inhibition. This means that if you aren’t using the right kind of growth parameters, it will affect the outcome and the quality of the fruit growing from the vines.
If you want to ensure optimal watering but don’t want to do it manually, drip irrigation is a great way out. Keeping the roots properly hydrated throughout the growing cycle ensures the prevention of unwanted fungal diseases as well.

Also, if you are hand-watering the plant, you want to avoid chucking buckets or water on the plant. Instead, show it with a sprinkler so that the water is spread out evenly.
As for fertilization, you want to stick to organic fertilizers. There is no alternative to this, especially if you want optimal and high-quality yield. The reason organic fertilizer works best is because of the beneficial microbes present in them.
Also, if the soil is lacking primary nutrients like phosphorus and nitrogen, check the levels in the soil first and then adjust and supplement the soil with the right products to eliminate any deficiencies.
How to Grow Butternut Squash in Small Spaces?
Since butternut squash grows on creepers and vines, it isn’t surprising at all that it requires a large space around to be able to grow without any inhibitions.
But, what happens when you have very limited space? The good news is that you can grow butternut squash in smaller areas too, provided that you don’t compromise on the accessory growing factors, including the soil components, fertilizers, watering, sunlight exposure, etc.
Also, choosing the right variety of butternut squash makes a huge difference. Variants like Butternut 900, Butterfly Butterscotch, Honeynut, etc. are good options to grow if you have limited space.

If you are growing the butternut squash in a container, variants like Burpee’s Butterbush make a good choice. It takes around 70-80 days to mature entirely, following which the plant can yield up to 4-5 plants in each.
Also, self-watering systems for these plants to ensure that your plants don’t have to compromise on watering at all. Ideally, you want to keep a check on the quality of the plant you are growing and follow the techniques mentioned.
Conclusion
That’s all you need to know about growing Butternut Squash from scratch. The process might seem a little lengthy and confusing. However, with the right techniques and environmental factors in play, you should be able to grow the plant from a seed in no time at all. We hope this article gives you all the insights you are on the lookout for.